This nth approach is based on a framer's blog. Essentially the instructions are to cut the legs with a 70.5° included angle and then use 45° for both the miter angle and the blade angle when cutting the mating ends.
Thirty lengths of pine were cut to 3/4" X 1" X 10" so that all were as near to identical as possible. The blade was carefully angled to 35.25° using the app, HandyLevel, on the phone and a 1-2-3 block to keep the phone vertical. A jig made previously was used to cut the triangular cross section. It has two settings, one for making the first cut on the rectangular cross section and one for making the second cut. The jig was recut with the new blade angle. Six legs were cut to the triangular cross section.
The final structure to be made of 5 inter-penetrating tetrahedra is formally known as a compound of five tetrahedra or a stellated icosahedron.
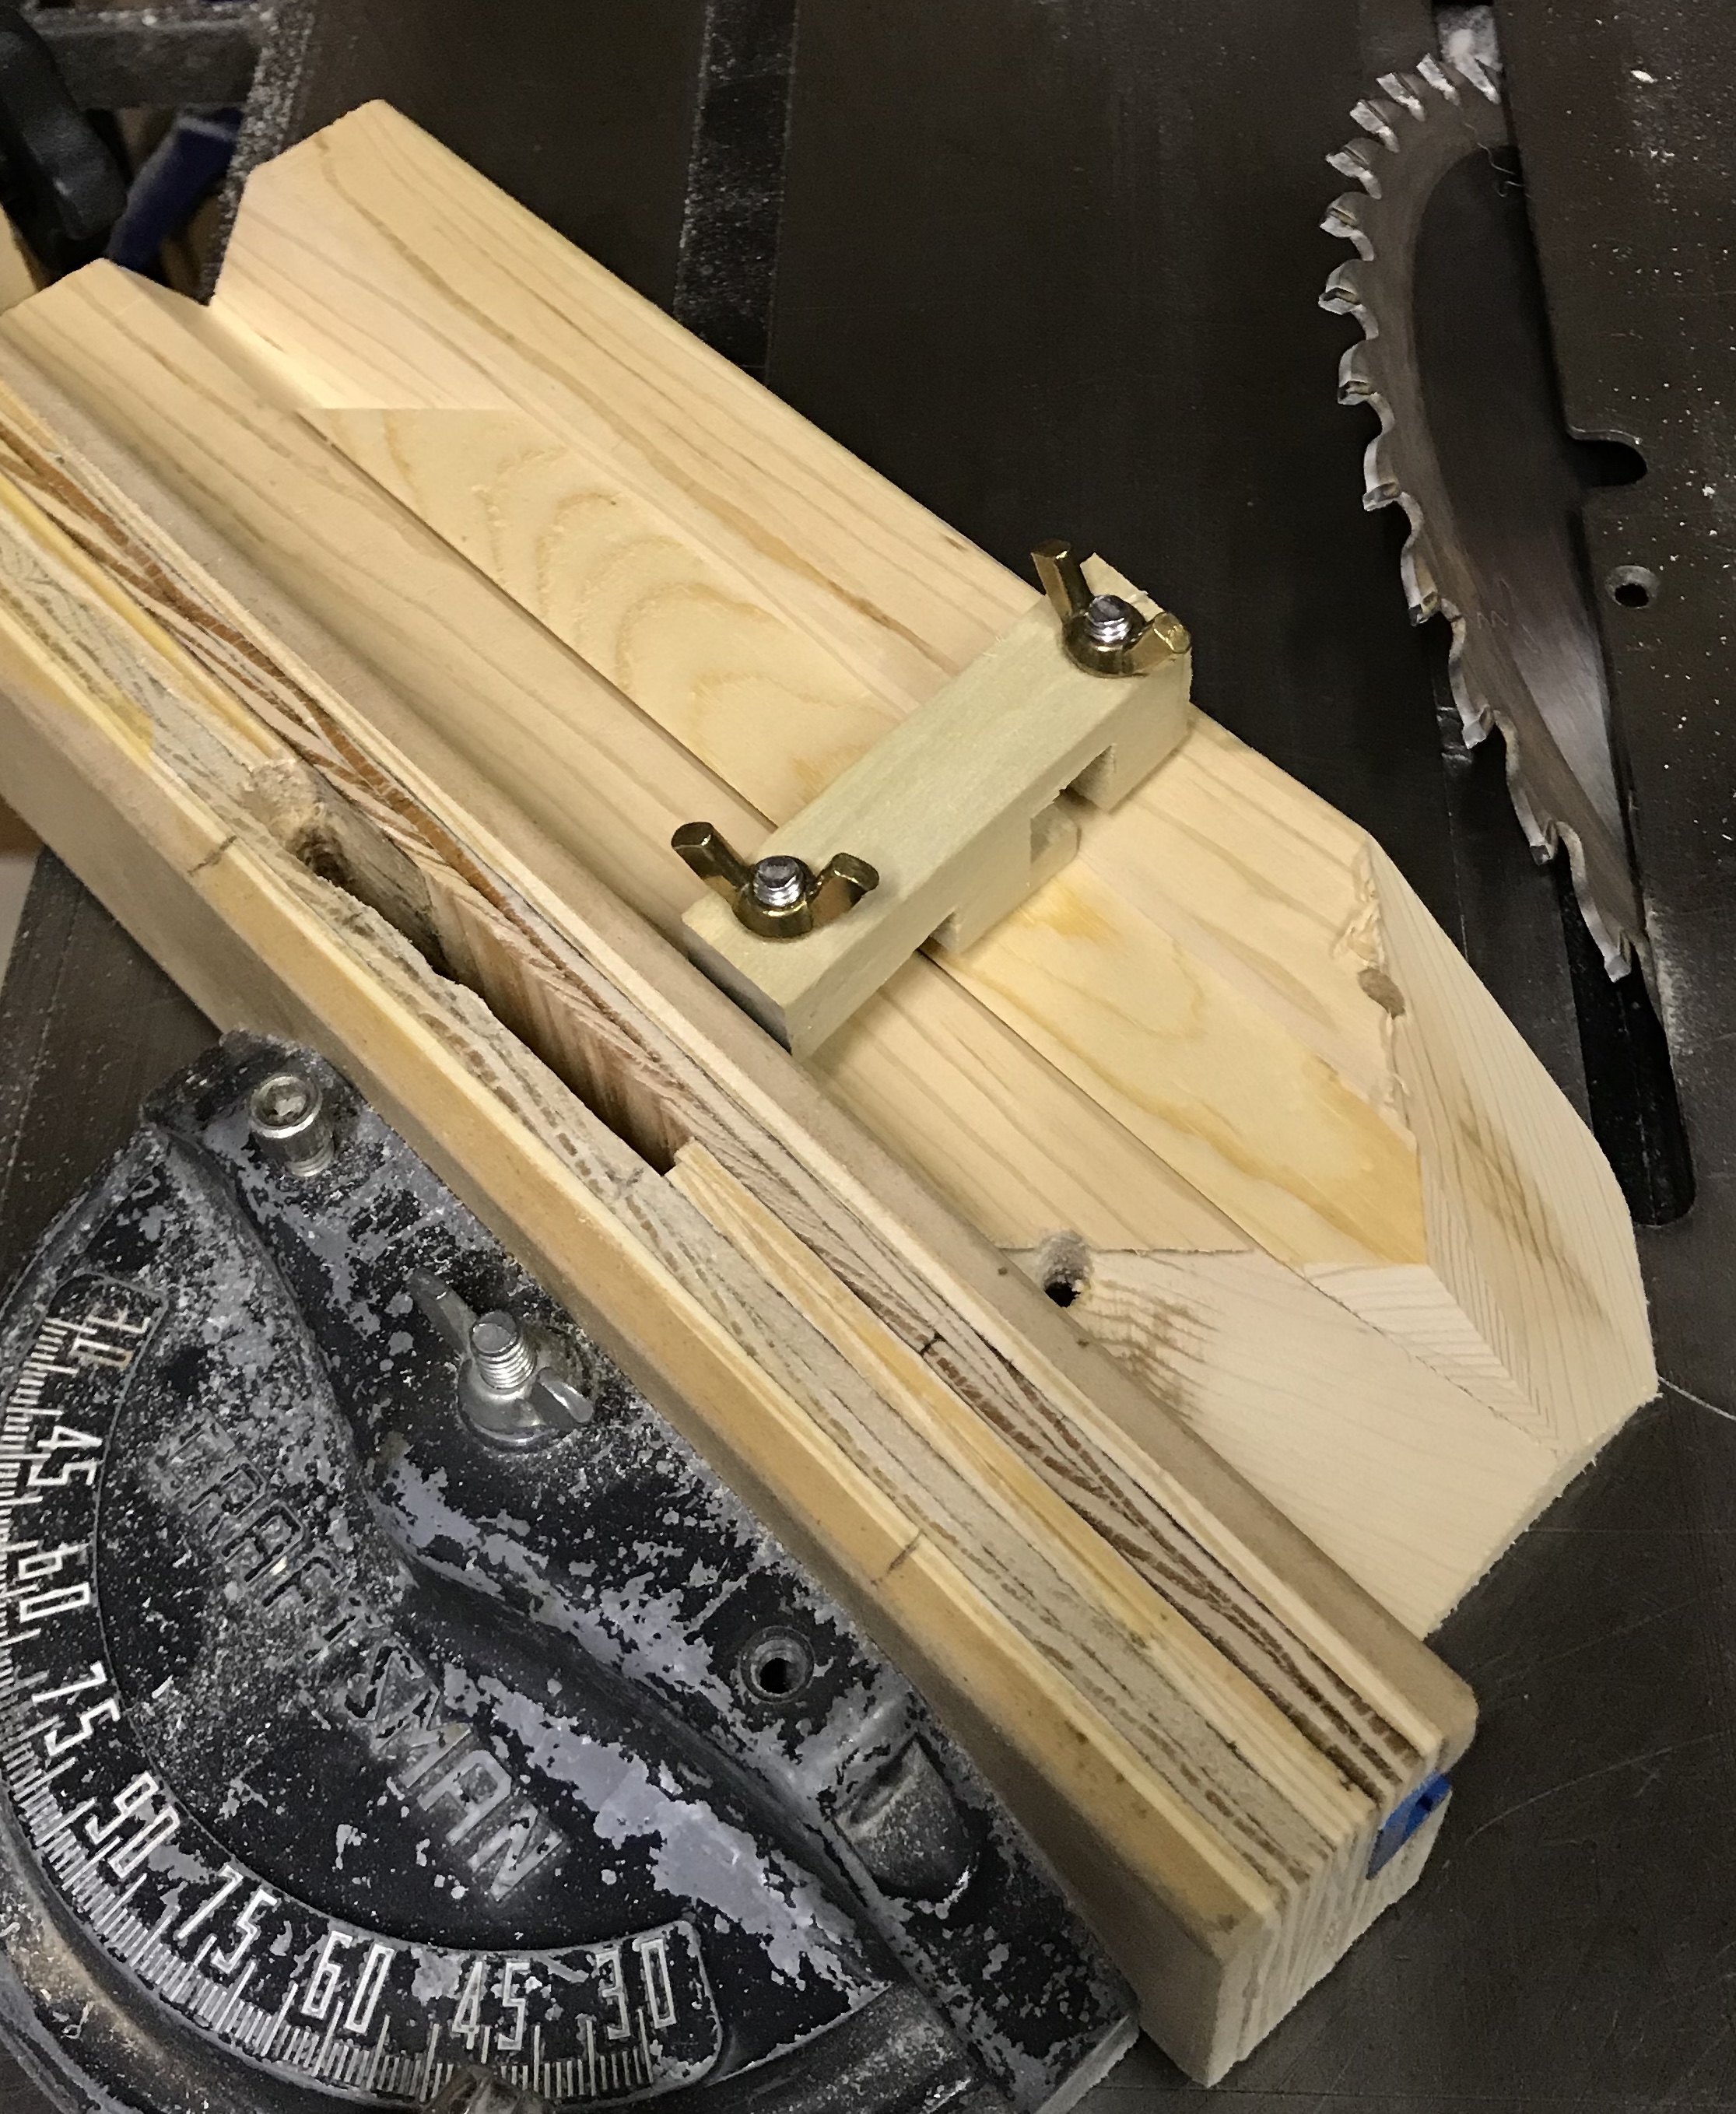
A second jig was then made to hold the triangular legs for cutting the ends with the compound miter setup. This jig was essentially a board with a vee groove cut down the middle and a clamp to hold the leg in place. The drill press fence was repurposed for use on the table saw by drilling two holes that align with the miter gauge. The 1/4" holes were countersunk and two 1/4-20 long bolts were used. The blade was already set at the correct angle so the vee groove was cut about 7/8" deep and centered in the 11" length of 2 X 4 used. A simple clamp was cut from poplar by hand and two holes were drilled. The 'fixed' end was drilled 5/16" and the 'clamp' end was drilled 1/4" for the two 1/4-20 screws. Matching holes were drilled in the vee block about 2" from the cutting end. These holes were countersunk through the vee block about 1".
After setting the 45° miter angle it became clear that the clamp was probably too close to the end so it had to be moved another 1" or so further from the blade end of the jig so as to not cut the screws with the table saw.
After fixing the jig a trial part was cut. I snuck up on the correct distance so the blade would cut across the point and no further. The six legs were then cut with the miter set to 45° on both ends. The miter was then repositioned to -45° and both ends were cut a second time. This gave a very neat set of legs with symmetrical tapers to the endpoints.
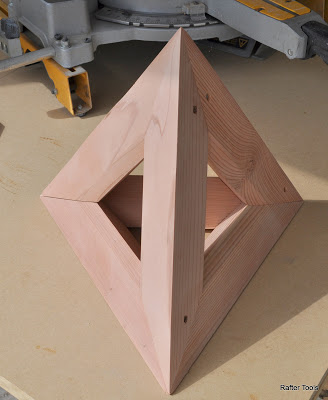
It worked!!!! The angles are almost perfect when the legs are 'tripled' up. The next challenge is figuring out how to 'clamp' the parts for gluing.
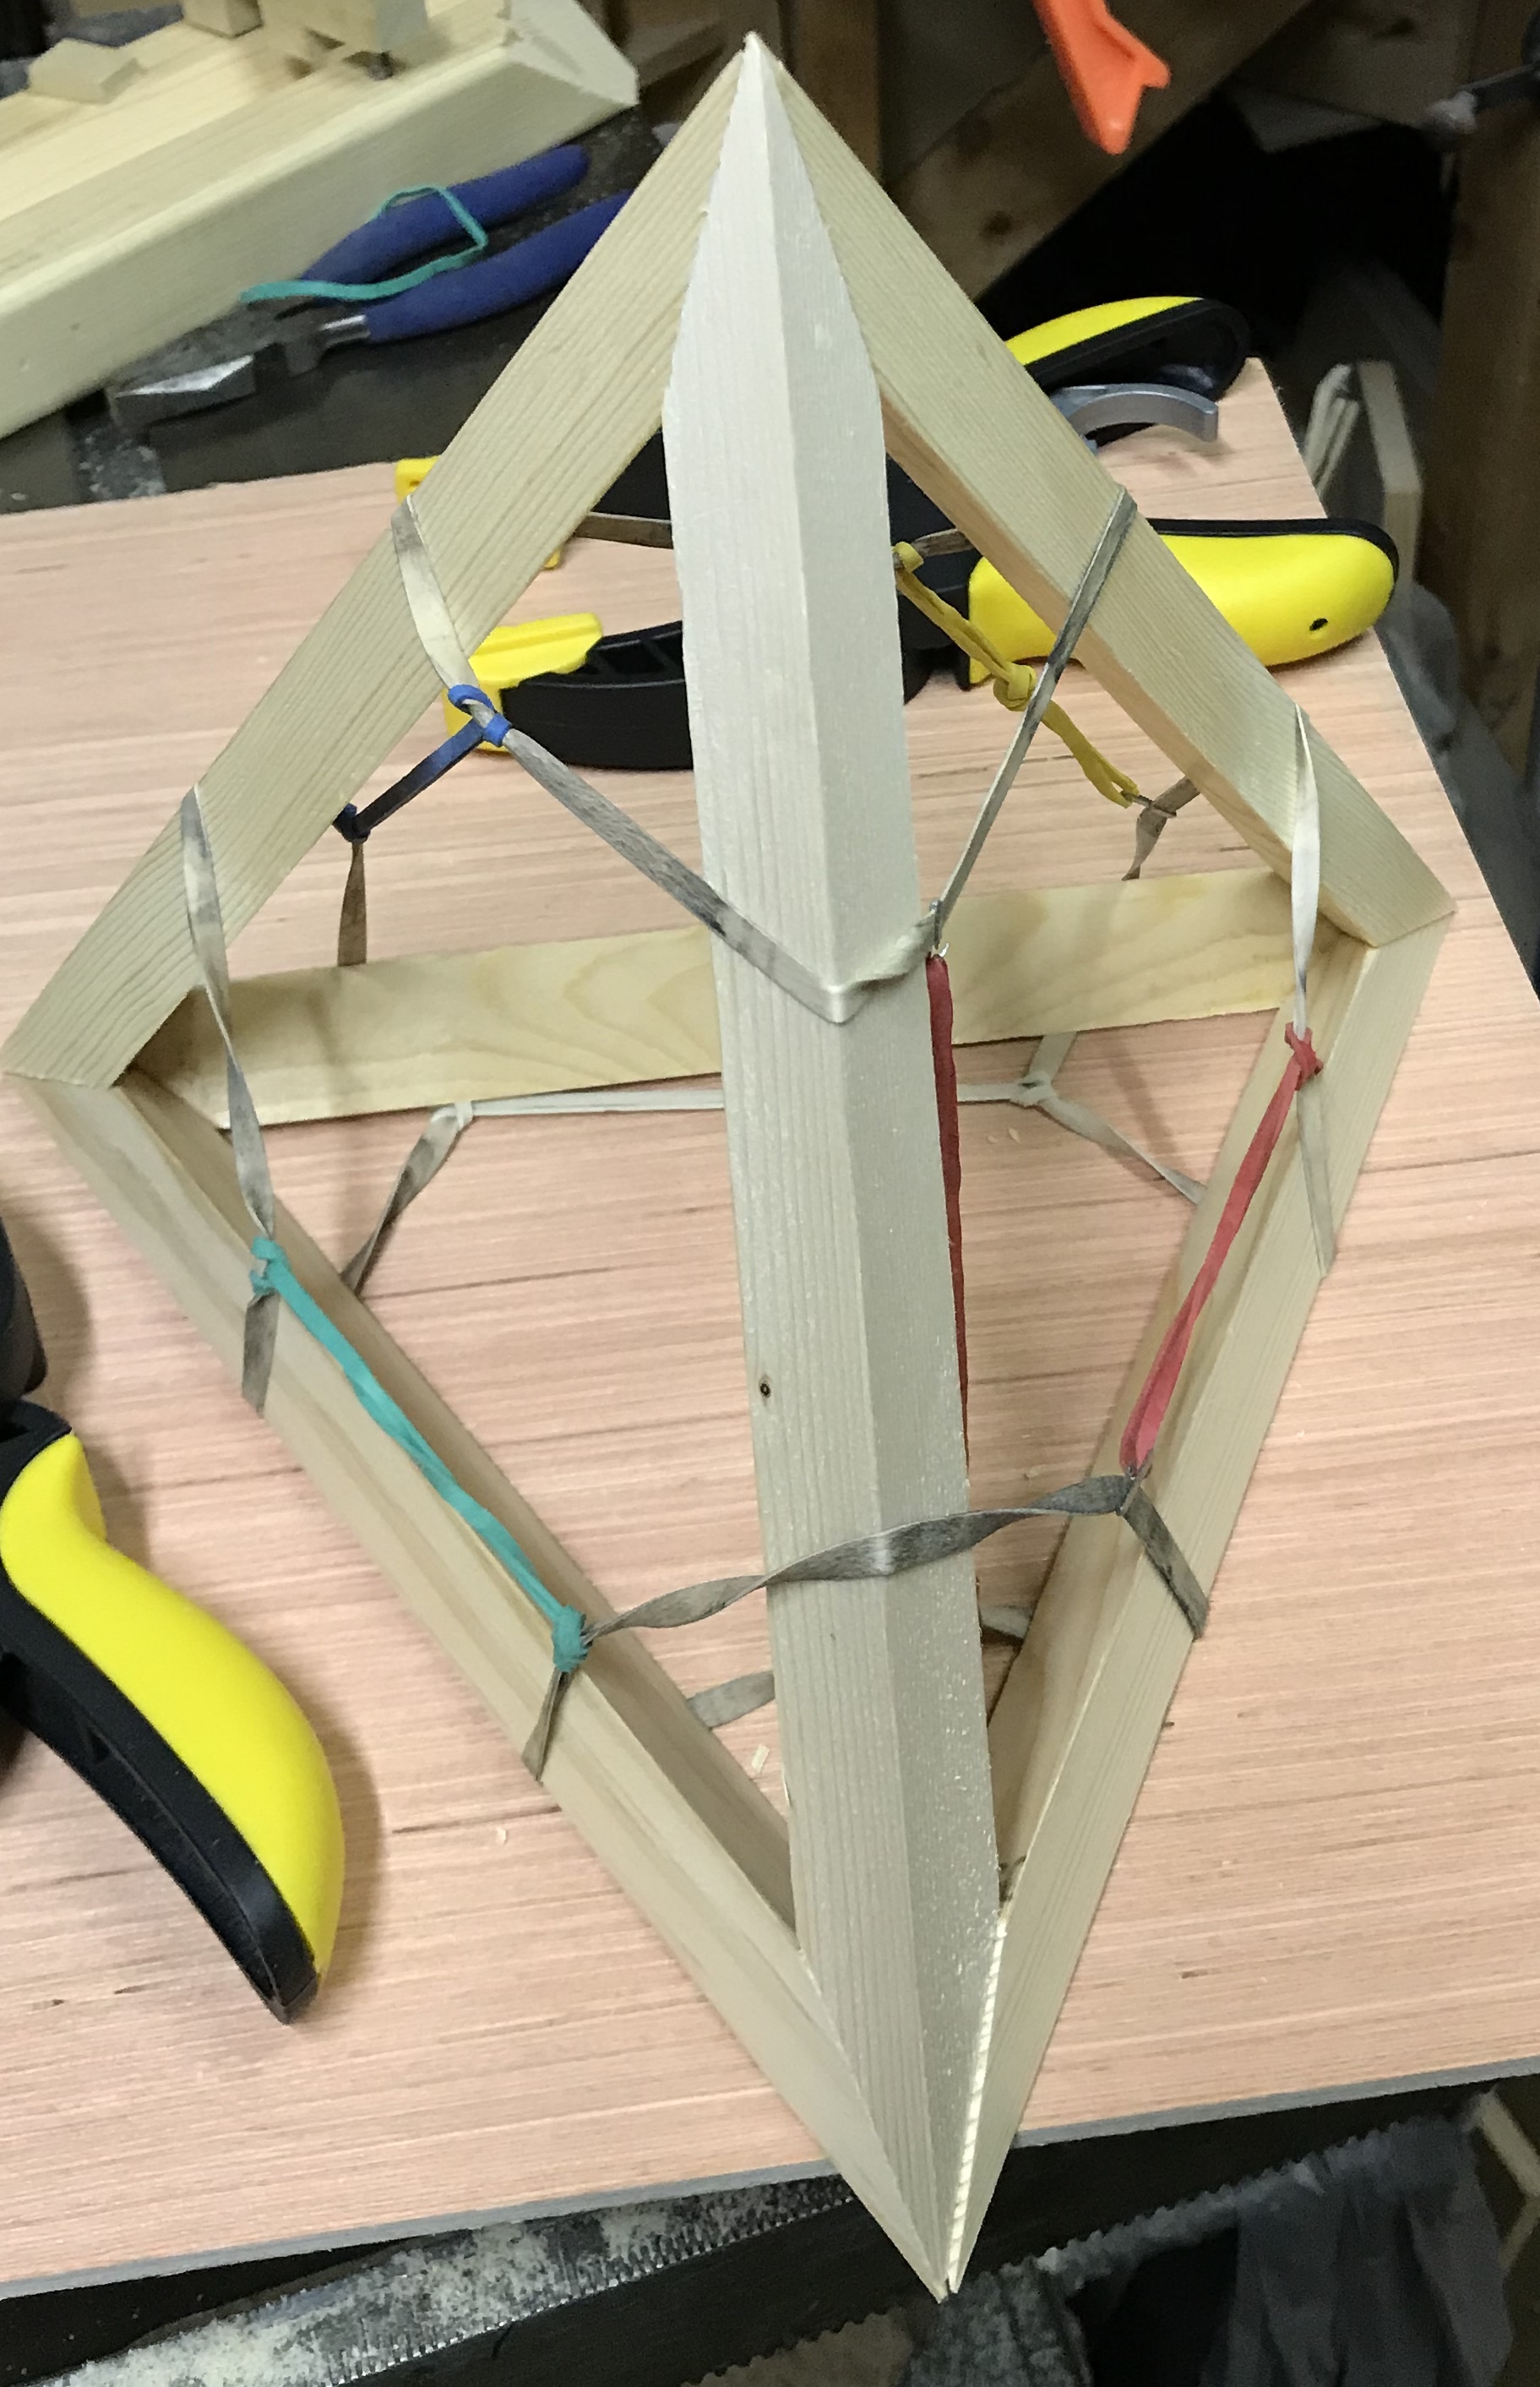
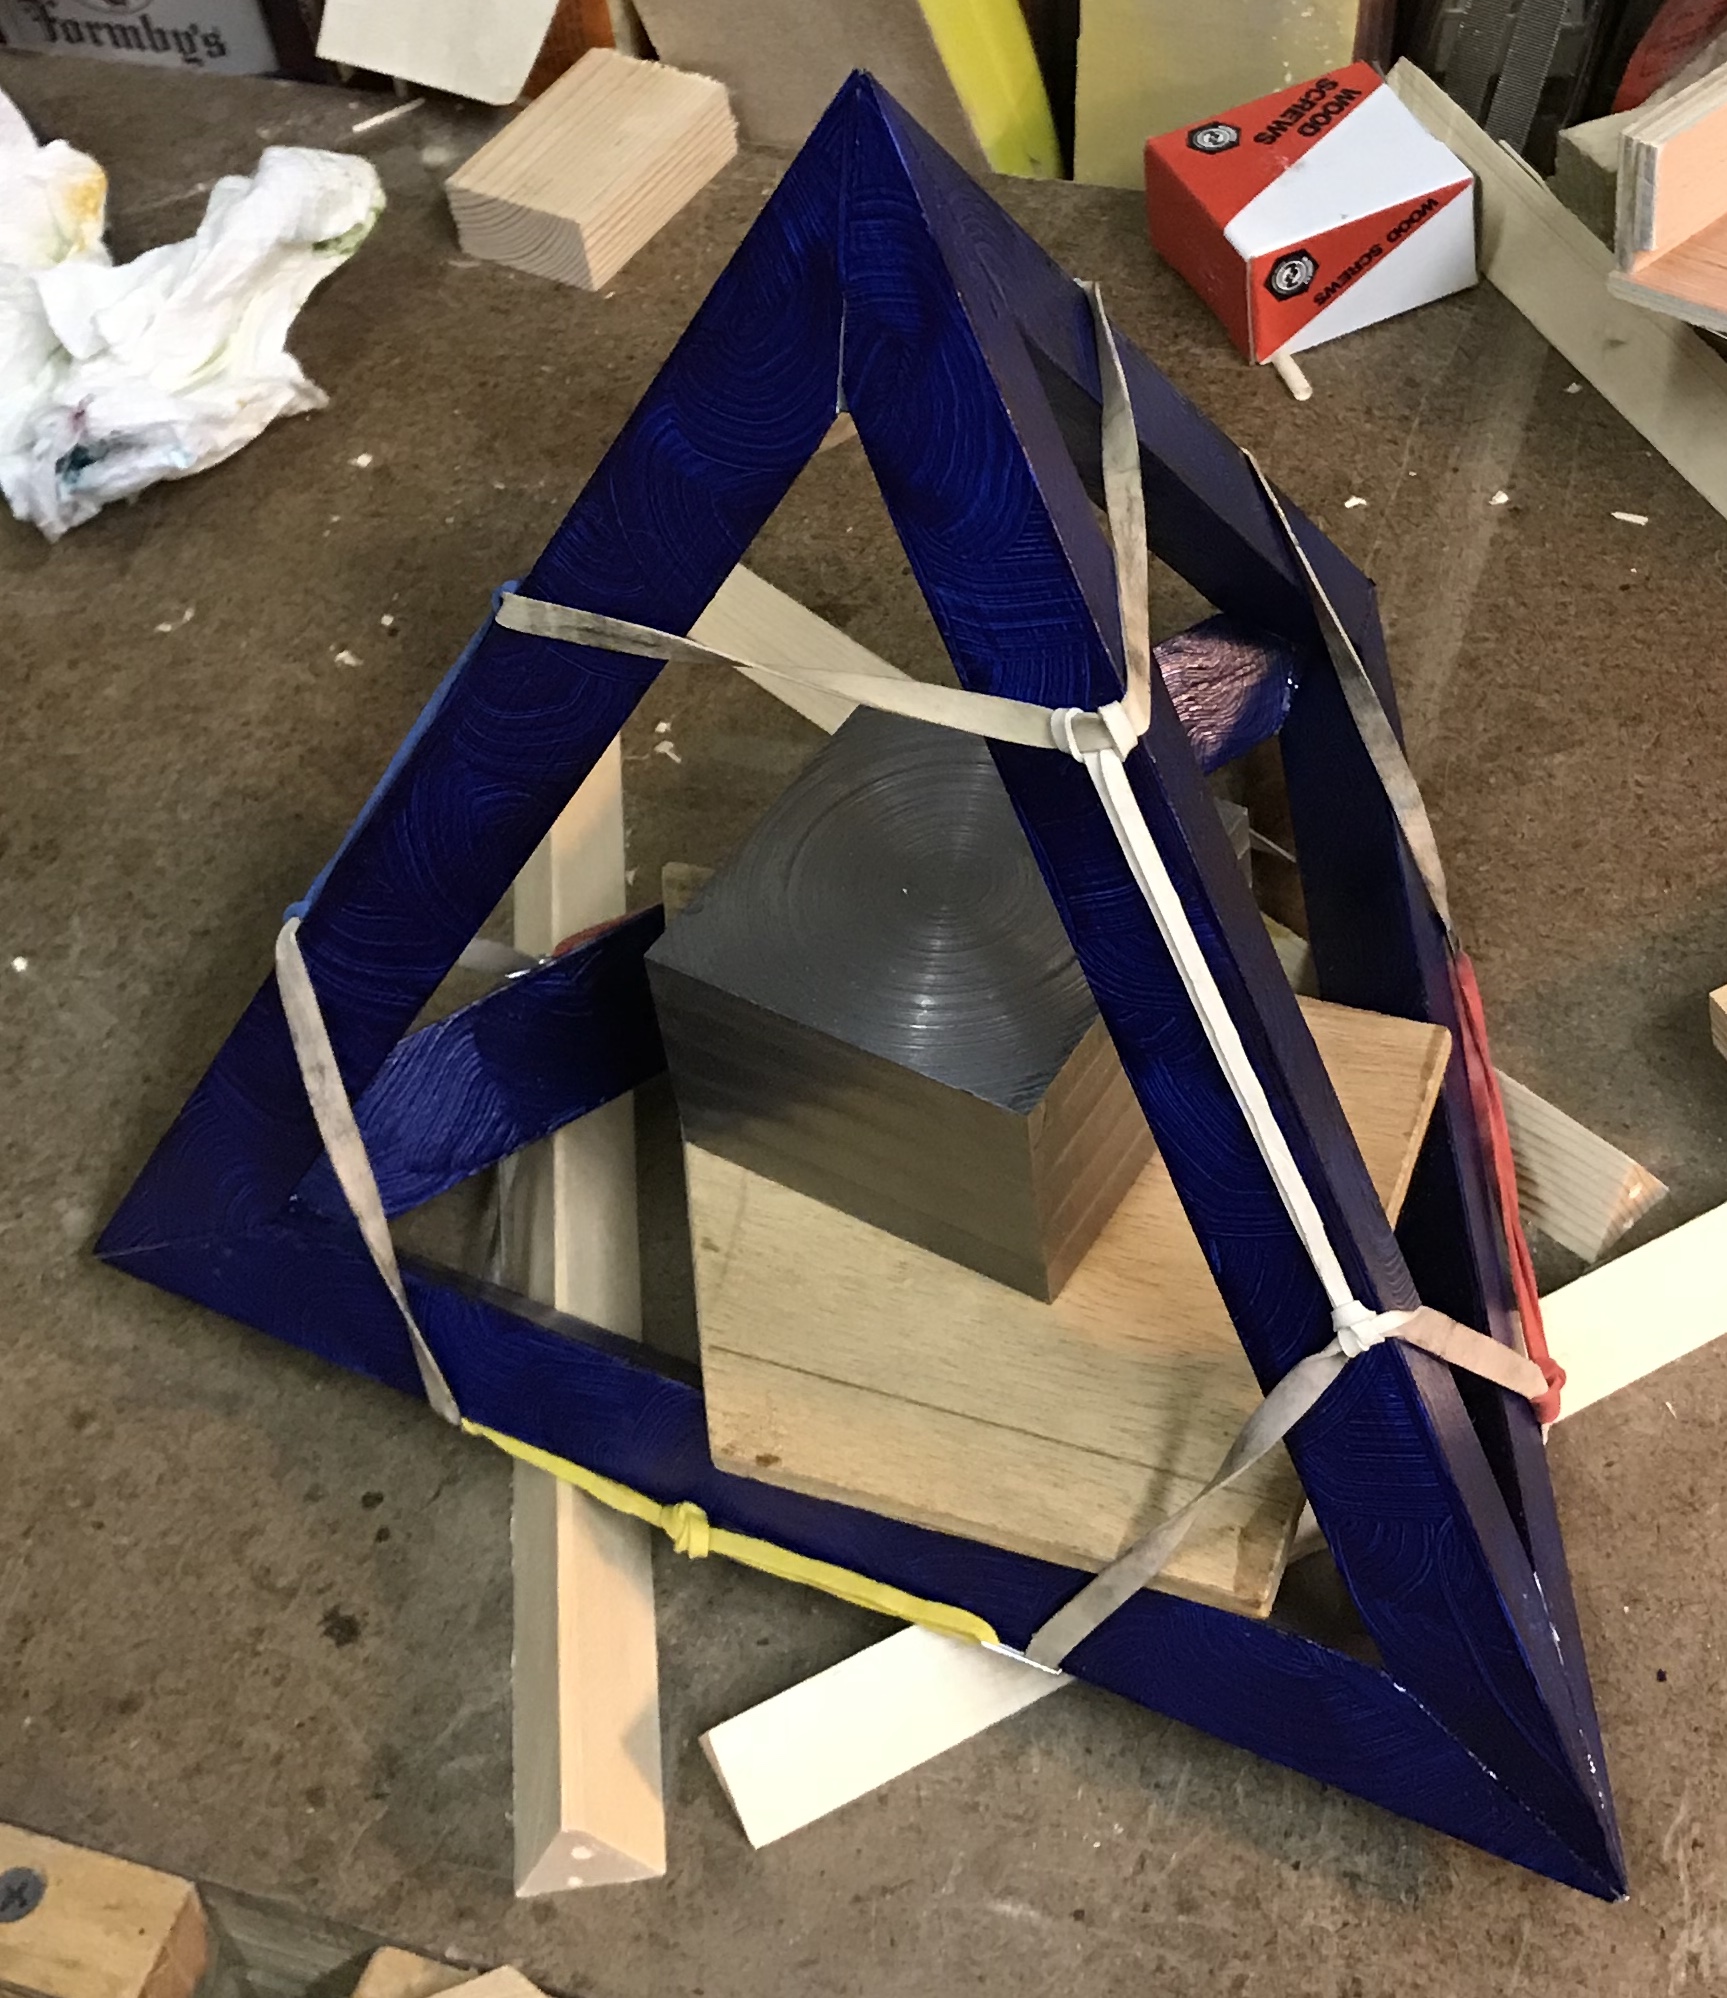
The first attempt at 'clamping' the parts together consisted of linking a bunch of rubber bands. Four rubber bands became corner holders, i.e. they were to loop around the three legs that make up each corner of the tetrahedron. These were each linked to the other three corner holders with three more rubber bands. The hope is that the linking rubber bands will provide enough force to pull the corner holders down so they exert sufficient force to hold the corners together for eventual gluing.
It was necessary to clamp the bottom triangle at two corners after putting the rubber band 'net' in place to free up the hands to align the top. There is no way this could be done while inter-penetrating the tetrahedra. A picture of the first tetrahedron is shown below.
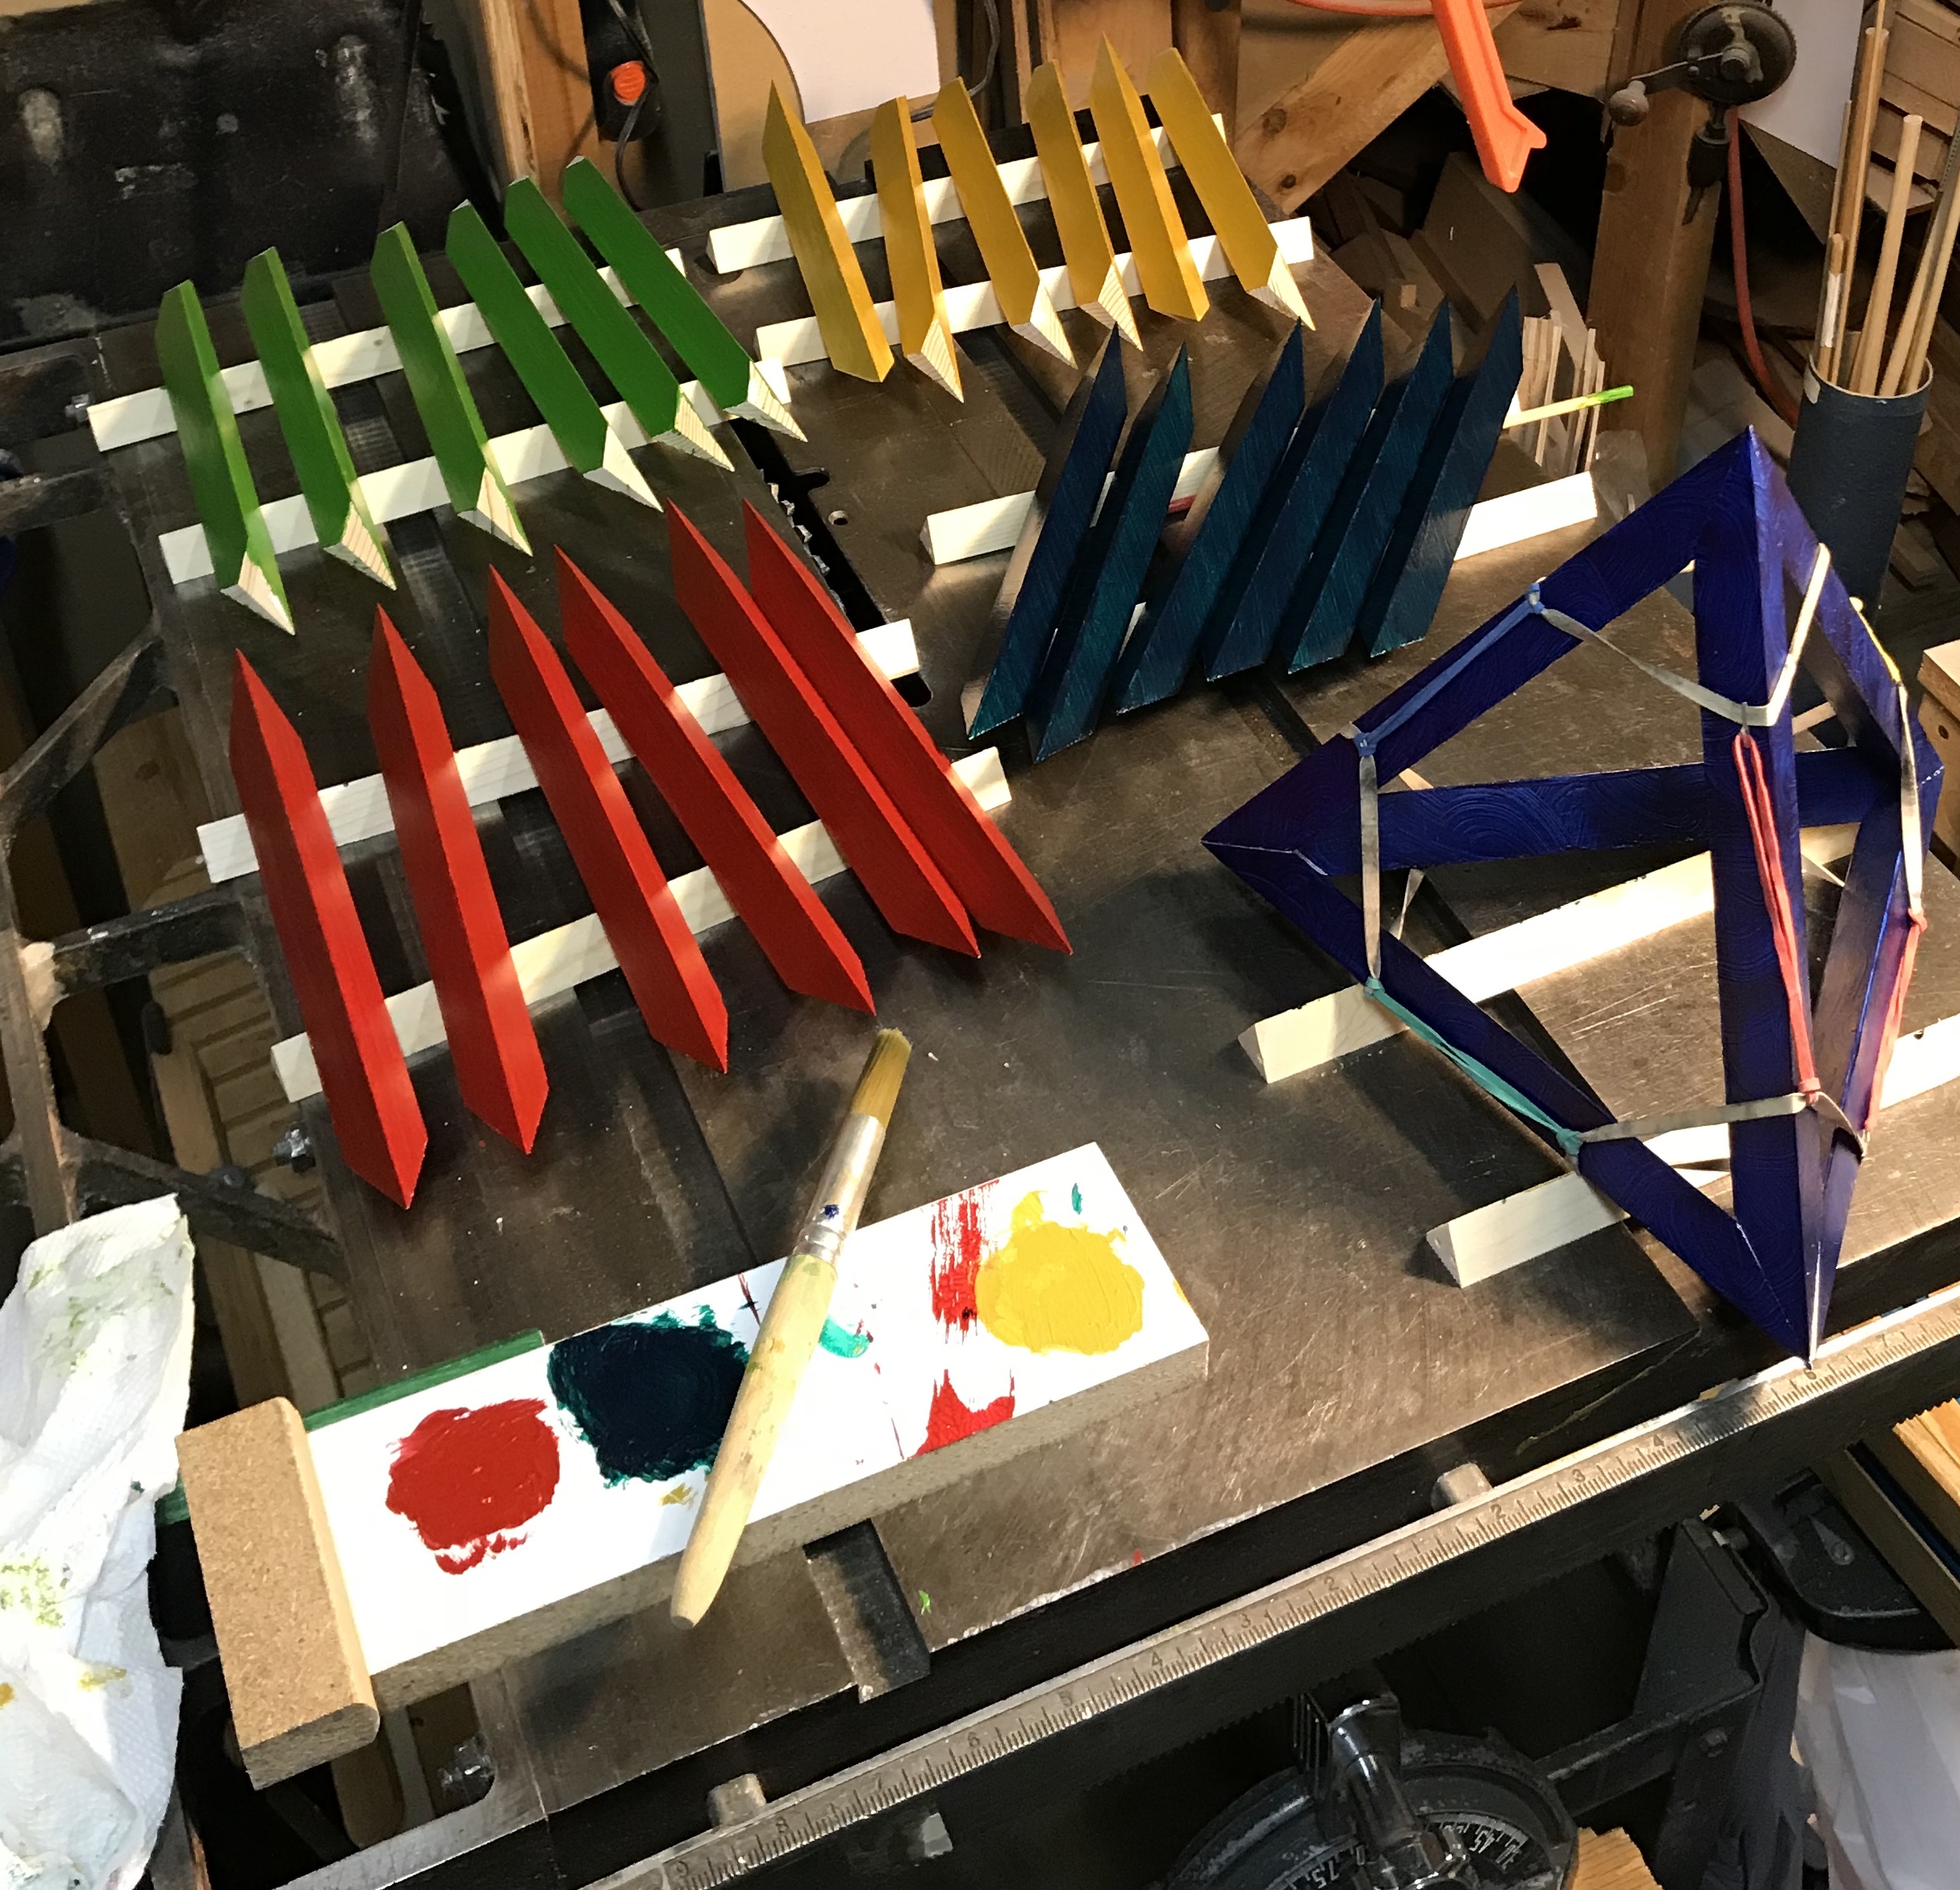
With the positive proof of concept the remainder of the tetrahedra legs were cut into triangular cross section and then mitered on the ends. About six hours were required to complete the legs for these four tetrahedra. An "artistic" color scheme needs to be chosen. I am not sure if I want to use 4-5 different stains or use paint. Decided to use paint. Purchased acrylic paint at an art store as it dries significantly faster than oil based paint. Need to sand and prime the parts prior to painting.
Sanded all of the legs with 100- and 200-grit sandpaper. Also sanded the three long edges so they would not be quite so sharp. After removing the dust from sanding, the parts were all primed with Kilz. The colors were chosen from a 10-pack of Reeves acrylics: crimson, phthalo blue, phthalo green, yellow ochre, and a one-to-one mix of medium yellow & light green. Six legs (a tetrahedron's worth) were painted in each color. Two sides of each leg were painted and after drying the third side was painted. For all colors except yellow ochre the paint dried to touch in about 1 hour. The yellow ochre took 24 hours!!
After struggling a bit the best way found to accomplish gluing the first tetrahedron was to put T-88 epoxy on the bottom three joints, put the three legs in place with the rubber band harness and a weight suspended across the bottom three legs. Epoxy was put on the ends of the other three legs and these were inserted through the rubber band harness. With Rhea's help holding two of the three top legs close to position, the third leg was put in position followed by the other two. Multiple careful adjustments were made to each of the corners in turn, while adjusting the rubber bands for a symmetrical fit. This resulted a pretty well-built tetrahedron held by the harness. Excess epoxy was wiped off. The joints were checked multiple times over the next hour to make sure no slippage had occurred. Slipping was not a problem during the dry run, but the epoxy is fairly slimy. The whole process took about 45 minutes, so a slow-drying epoxy is the right choice.
The second tetrahedron presented a few new challenges. The first tetrahedron needed to be suspended by a vertex, so a three leg base for the second tetrahedron could be formed. A triangular hole was cut in a shoe box with the sides 2.25" long. Longer sides, 2.5", proved too long. With the first tetrahedron in place in the hole three legs of the second tetrahedron were laid in place and the harness put around the parts. Each of the three remaining legs were threaded through the bottom and top harness holes and then moved into position. With a lot of adjusting the legs were all held in the appropriate configuration. Spacers (1/8") were used between the 'vertical' legs of the first tetrahedron and the bottom legs of the second tetrahedron. Otherwise the top legs of the first tetrahedron pushed too hard against the last three legs of the second tetrahedron making it impossible to get them in place.
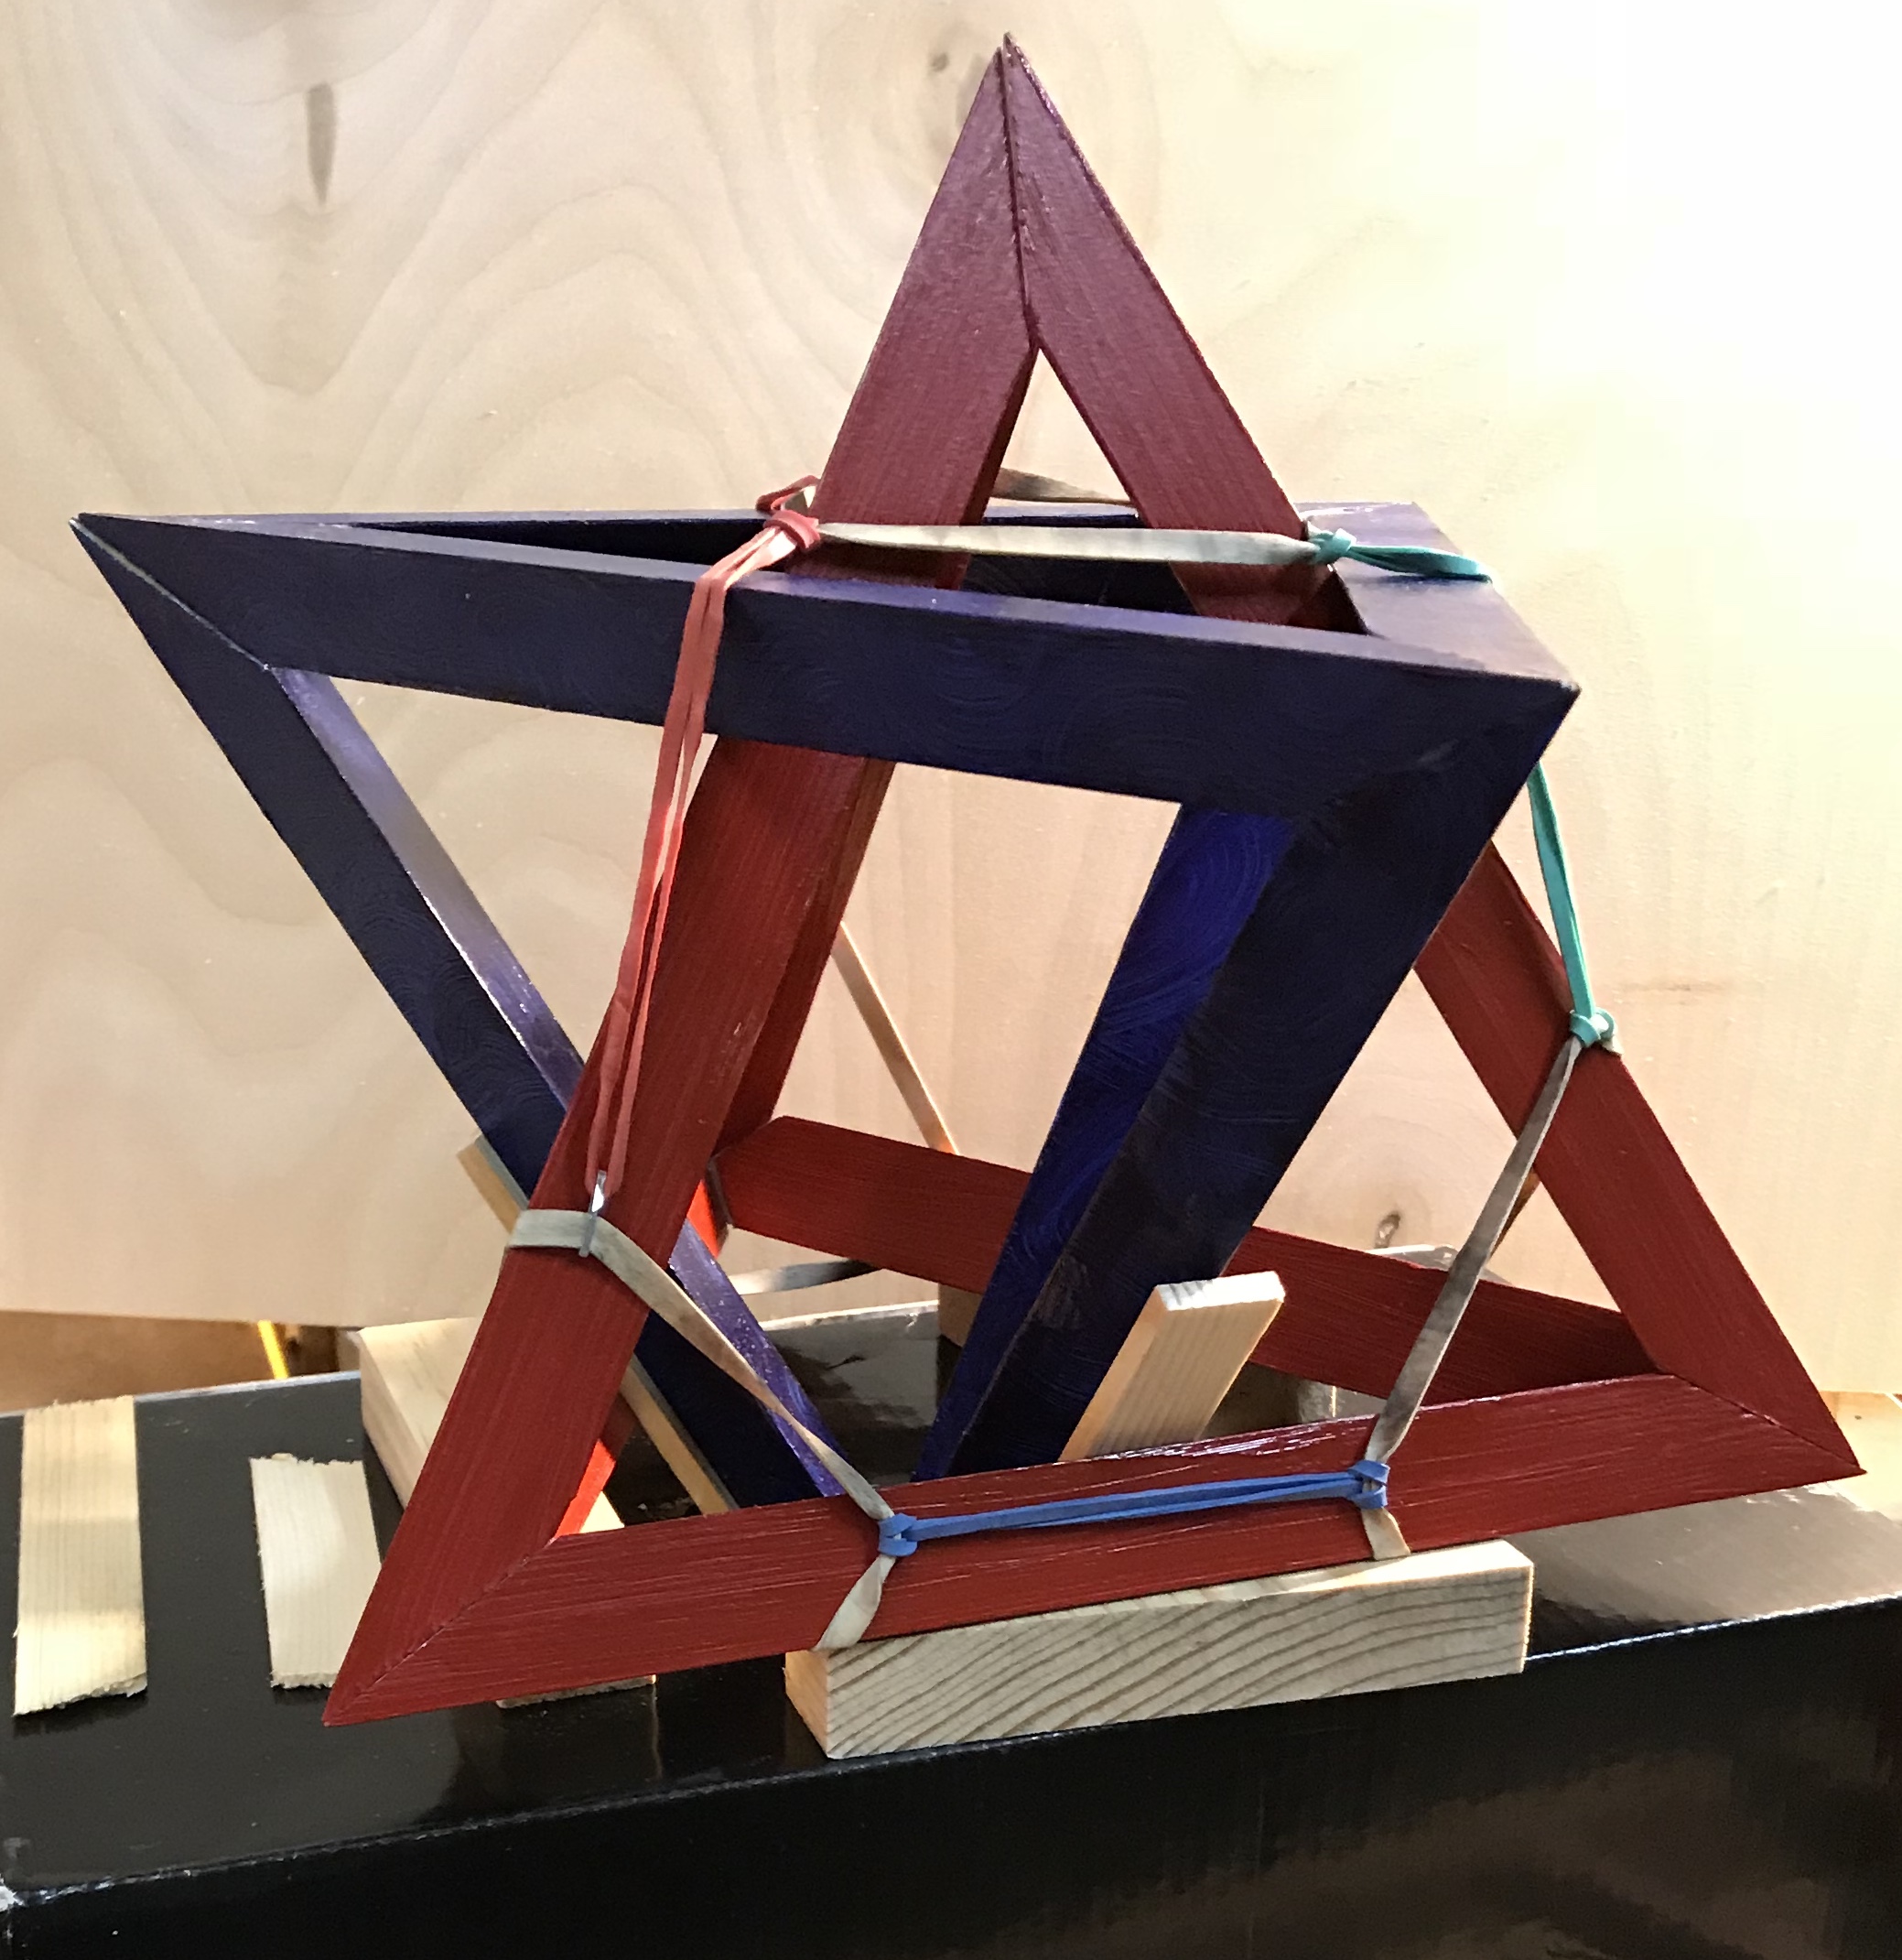
The top three legs were removed and the bottom three glued. Glue was put on the top three, they were threaded into place, and then all legs were arranged as best as possible to form the second tetrahedron. The vertices were adjusted as needed over the next 30 minutes and then the whole was left to dry for 36 hours.
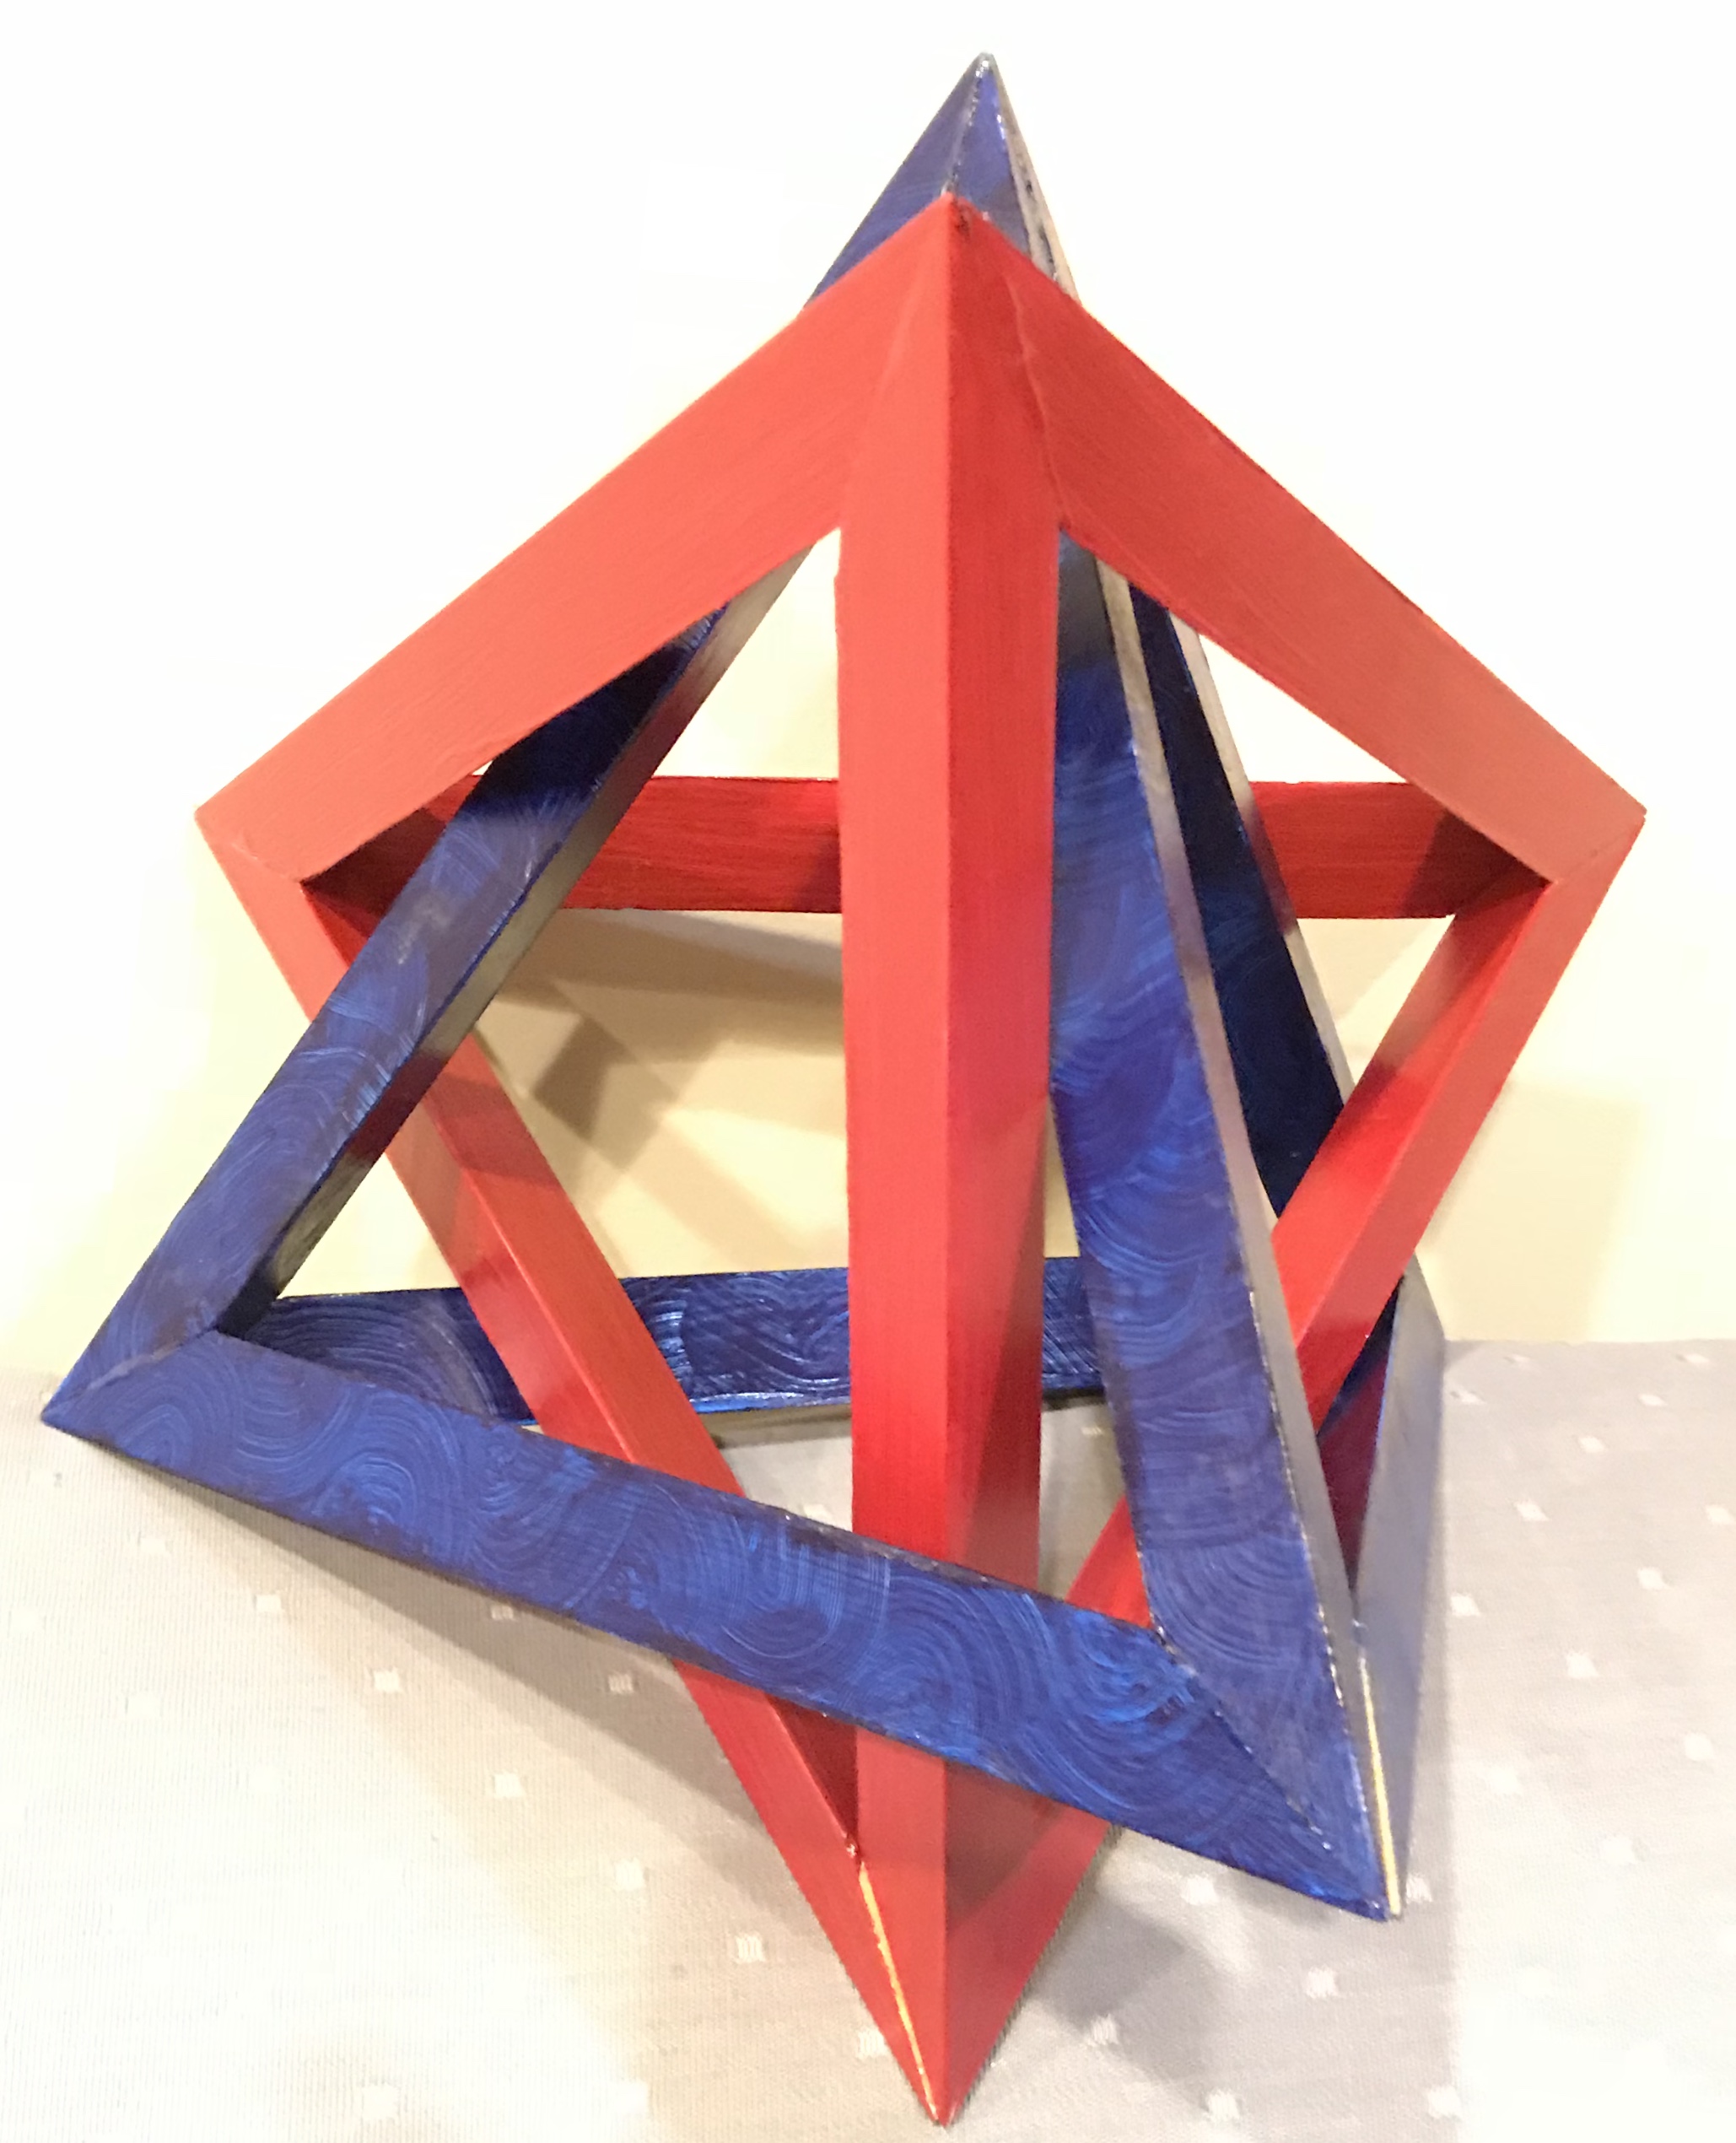
Oops! Another failure!! The third tetrahedron could not be fit within the first two. The legs of the glued tetrahedra are too close together. The legs are too fat!!! The original calculation determined a ratio of 12:1 for length vs height. The legs produced here are 9 5/8" long and 3/4" high. I think the problem is the base of the triangle. It is 1" wide and the sides are 7/8". The overall size of this triangle is too large. The next iteration should be closer to 10" X 5/8". With a top angle of 69.7° the bottom of the triangle will then be 0.870" (or 7/8").